background

Showing posts with label Recipes. Show all posts

Thursday, September 4, 2014

Mexican Food Make-Over (Spanish Cauli-Rice Recipe)

I am a born & raised, Texas-loving girl to the core.  If there is one thing I miss about living in Texas, besides being close to family, it's Tex-Mex food!!  The husband & I are still going strong on an 80/20 grain-free life-style, and up to this point Mexican food has been a bit tricky.  We have adjusted to substituting lettuce leaf for tortillas.  However, I was still missing & craving spanish rice.  Insert cauliflower to the rescue!!!  I know I say this a lot, but this recipe has been tested, kid-approved, and this past weekend I served it at a dinner party and everyone was complimenting the "rice".  I loved seeing all the facial reactions & disbelief when I told them it was actually all vegetables.  I promise this is a sure win-win for your family!  It's super easy to throw together, lots of veggies, and tastes even better than that old bland Spanish rice from the box or bag.

Spanish Cauli-Rice


Ingredients:
 
1 head of cauliflower, grated*
1 Tablespoon olive oil
2 tomatoes, chopped
2 cloves garlic, finely chopped
1/4 cup onion, chopped
1/4 cup bell pepper, chopped (can use any color, for a more authentic taste, use green.  I like to use a little of yellow & green for more pops of color)
1 jalapeño, seeded, deveined & chopped
1 & 1/2 teaspoons salt
1 & 1/2 teaspoons cumin
1/2 cup water
 
Directions:
 
Trim the florets of cauliflower from the stem & leaves.  Place the florets in a food processor fitted with the grating attachment.  Process until all the florets have been turned into "rice"  You can also use a box cheese grater & do this by hand.


Heat the oil in a large skillet or dutch oven over medium heat.  Add the tomatoes, onion, bell & jalapeño peppers, and garlic.  Saute for about 5 minutes, stirring frequently, until onions start to look translucent.  Add in cauliflower and continue cooking for 5-7 more minutes.
 
Add in cumin, salt, and water.  Stir to combine, and then cover for 5 minutes to let the cauli-rice steam.  Remove lid and continue cooking until all the water has absorbed, stirring every few minutes. 


Enjoy!


Friday, April 25, 2014

Mama Want a Cracker????

I feel the need to apologize.  I have had a bad case of spring fever and have let all my "some day projects" take over my life.  I feel the proverbial clock ticking as summer approaches and my free/me time will be drastically reduced with all the kiddos around.  So I am attempting to get as much done as possible in what little time I have left.  Rest assured I have been busy in the kitchen too creating more delicious (& healthy) recipes, but alas there are only so many hours in the day and thus the blog has suffered great neglect.  The plus side is that I have a stack full of posts just ready & waiting to share with you.  Everything from chalk painting & stenciling walls (my newest obsession) to tofu & graham crackers.  Nothing like a little variety right?!?! 

So let's get crackin'....

I am not a big bread eater.  I've never been a fan of sandwiches, toast, buns, etc.  But crackers are a whole different category.  My absolute favorite snack is peanut butter & graham crackers.  Can you say "healthy nutter butter cookie knock off".  LOL!   I have been determined to recreate a somewhat simple, grain-free version to satisfy this childhood indulgence and I can finally say (in the words of Professor Higgins from My Fair Lady)  "By George, She's got it!"

 
Grain-Free Graham Crackers
 
(these are gluten-free, and dairy-free)


Ingredients:
 
1/4 cup coconut flour
3/4 cup almond flour
2 Tablespoons coconut sugar
1/4 teaspoon salt
1/4 teaspoon baking soda
1/2 teaspoon cinnamon
1 Tablespoon honey
1 egg, slightly beaten
1 teaspoon vanilla
1 Tablespoon coconut oil, melted
 
Directions:
 
Preheat oven to 375 degrees.
 
Line a large cookie sheet with parchment paper.
 
In a medium mixing bowl, combine coconut flour, almond flour, coconut sugar, salt, baking soda, & cinnamon.  Stir to combine.
 
In a separate small bowl mix together honey, egg, and vanilla.
 
Add wet ingredients to dry ingredients and stir until moistened.  Stir in melted coconut oil.  Dough should form a stiff ball.  Chill in the refrigerator for at least 10 minutes.


Roll the dough out to 1/8" thickness (i.e. super thin) between 2 sheets of parchment paper.


Remove top sheet of parchment paper and cut dough into desired shape using small cookie cutters or a pizza wheel.


Bake for 6-7 minutes, or until edges are starting to brown. 
 
Remove from oven, cool for 1-2 minutes & break into crackers. 
 
Store in an air-tight container.
 
I prefer to slather mine with some fresh-ground peanut butter and a slice of banana, but to each their own.
 
Enjoy!!!


Friday, April 4, 2014

Paleo Chocolate Chip Cookies

Aaah, the "all-American" quintessential dessert.  As a peace-offering to my husband for having to endure watching the children consume each and every girl scout cookie in the house, I made certain to finish tweaking my grain-free, gluten-free, dairy-free chocolate chip cookie this week.  I can assure you I have the most proficient panel of palettes for my taste-testers in the dessert department, and they have all awarded this version the blue-ribbon seal of approval.


Chocolate Chip Cookies (Paleo)

(grain-free, gluten-free, and can be dairy-free with your choice of chocolate chip)

Ingredients:

1 & 1/2 cups almond flour
2 Tablespoons coconut flour
1/2 teaspoon baking soda
1/2 teaspoon salt
3 Tablespoons coconut sugar
1 egg
1 Tablespoon almond milk (unsweetened)
1 teaspoon vanilla
2 Tablespoons pure maple syrup
1/4 cup coconut oil, melted (I prefer unrefined)
1/2 cup chocolate chips (can be dairy free)

Directions:

Preheat oven to 375 degrees.

Line a cookie sheet with parchment paper.

In a medium mixing bowl add almond flour, coconut flour, baking soda, salt, and coconut sugar.  Stir to combine.

In a small mixing bowl combine egg, milk, vanilla, and maple syrup.  Mix wet ingredients until thoroughly blended.  Pour wet ingredients into dry ingredients, and stir to combine.  Pour in melted coconut oil and stir to create a smooth, stiff dough.  Stir in chocolate chips.  Scoop dough on to parchment paper by rounded tablespoon mounds approximately 2 inches apart. 

Bake for 10-11 minutes, or until lightly browned around the edges. 

Cool on wire rack, or enjoy fresh from the oven!

Yum! 

Tips:

* Chill dough in the refrigerator between batches to create optimal results. 
* Baked cookies can be frozen to help maintain the crispy outer texture. 
* Store in an air-tight container to maintain freshness.  Cookies will take on a soft, chewy cookie texture. 

Thursday, March 6, 2014

Are you Coo-Coo for Cocoa??? (Coco Chip Puffs Recipe)

Some days I want to be like Adam Sandler in the movie "Click" and have a remote to life.  There are the seasons that I would love to fast-forward, the scenes I wish I could delete, the moments I want to rewind and relive over and over again, and then there are days like today where I wish that I could just hit pause.  You see, my oldest is home sick.  Thankfully he is in great spirits and it's a manageable case of strep.  So after the dreaded positive "swab test", and a trip to Target for meds, Clorox wipes, throat lozenges, and a new toothbrush, we had a leisurely afternoon of hanging out.  It was wonderful to soak up some long over-due quality one on one time with him.  He read to me from his latest book, quizzed me on things from the 2014 world records book, and then we watched a little Duck Dynasty.  After lunch he wanted to rest, so I set up camp in the kitchen to whip up his new favorite food for an "after school" surprise snack when his sisters get home.

We actually came up with the name for these while sitting in the waiting room at the walk-in clinic this morning.  These little guys are super easy to whip up, and after some feedback on the brownies, I will say this is definitely a beginner-level recipe. And BONUS, you will be happy to know it only dirties three bowls.  The best way I can describe these little guys is like a fluffy chocolate chip cookie.  It even melts in your mouth.  Mmmm! 


Coco Chip Puffs
(the taste of chocolate chip scone combined with the ease of a drop biscuit)
(these are grain-free, gluten-free, and can be dairy-free with your choice of chocolate chip)


Ingredients:

1 & 3/4 cup almond flour/meal
1/4 cup coconut flour
1/4 teaspoon salt (I prefer sea salt)
1/2 teaspoon baking soda
1 Tablespoon ground flax
1/4 cup honey
1 Tablespoon vinegar
2 Tablespoons coconut milk
1 egg
1 teaspoon vanilla
2 Tablespoons unrefined coconut oil, melted
1/4 cup chocolate chips (I prefer the mini ones so you get a little chocolate in each & every bite)
 
Directions:
 
Preheat oven to 350 degrees.

Line a baking sheet with parchment paper.

In a medium mixing bowl combine flours, salt, baking soda, and flax.  Stir to combine.

In a separate bowl add honey, vinegar, coconut milk, egg, and vanilla.  Stir until evenly blended.

Add wet ingredients to dry ingredients and stir just until all ingredients are mixed together and moistened.  Pour in melted coconut oil and stir yet again.  Now just stir in the chocolate chips and your almost done.

Drop dough by the spoonful onto the parchment-lined baking sheet into 9 biscuits and slightly flatten using the back of the spoon or fingertips dipped in water (to prevent sticking).
Bake for 12-14 minutes until slightly browned around the edges and it feels "set" (or slightly firm) in the center.  Let cool on pan 10-15 minutes before transferring to a plate/storage container.  Honestly, we can not resist waiting and eat them right off the cookie sheet fresh from the oven, but they tend to crumble if you do not let them cool slightly first.

Store leftovers in an air-tight container.

Nutritional Information: (approximate)

Serving: 1 puff

Calories: 200 calories
Fat: 15.5 g
Carbs: 15g
Sugars: 9g
Protein: 6g
Fiber: 3.5g

I promise, this is the closest thing you can have to a cookie for breakfast, not feel guilty about, and will still leave you satisfied for hours.

Enjoy!


Saturday, March 1, 2014

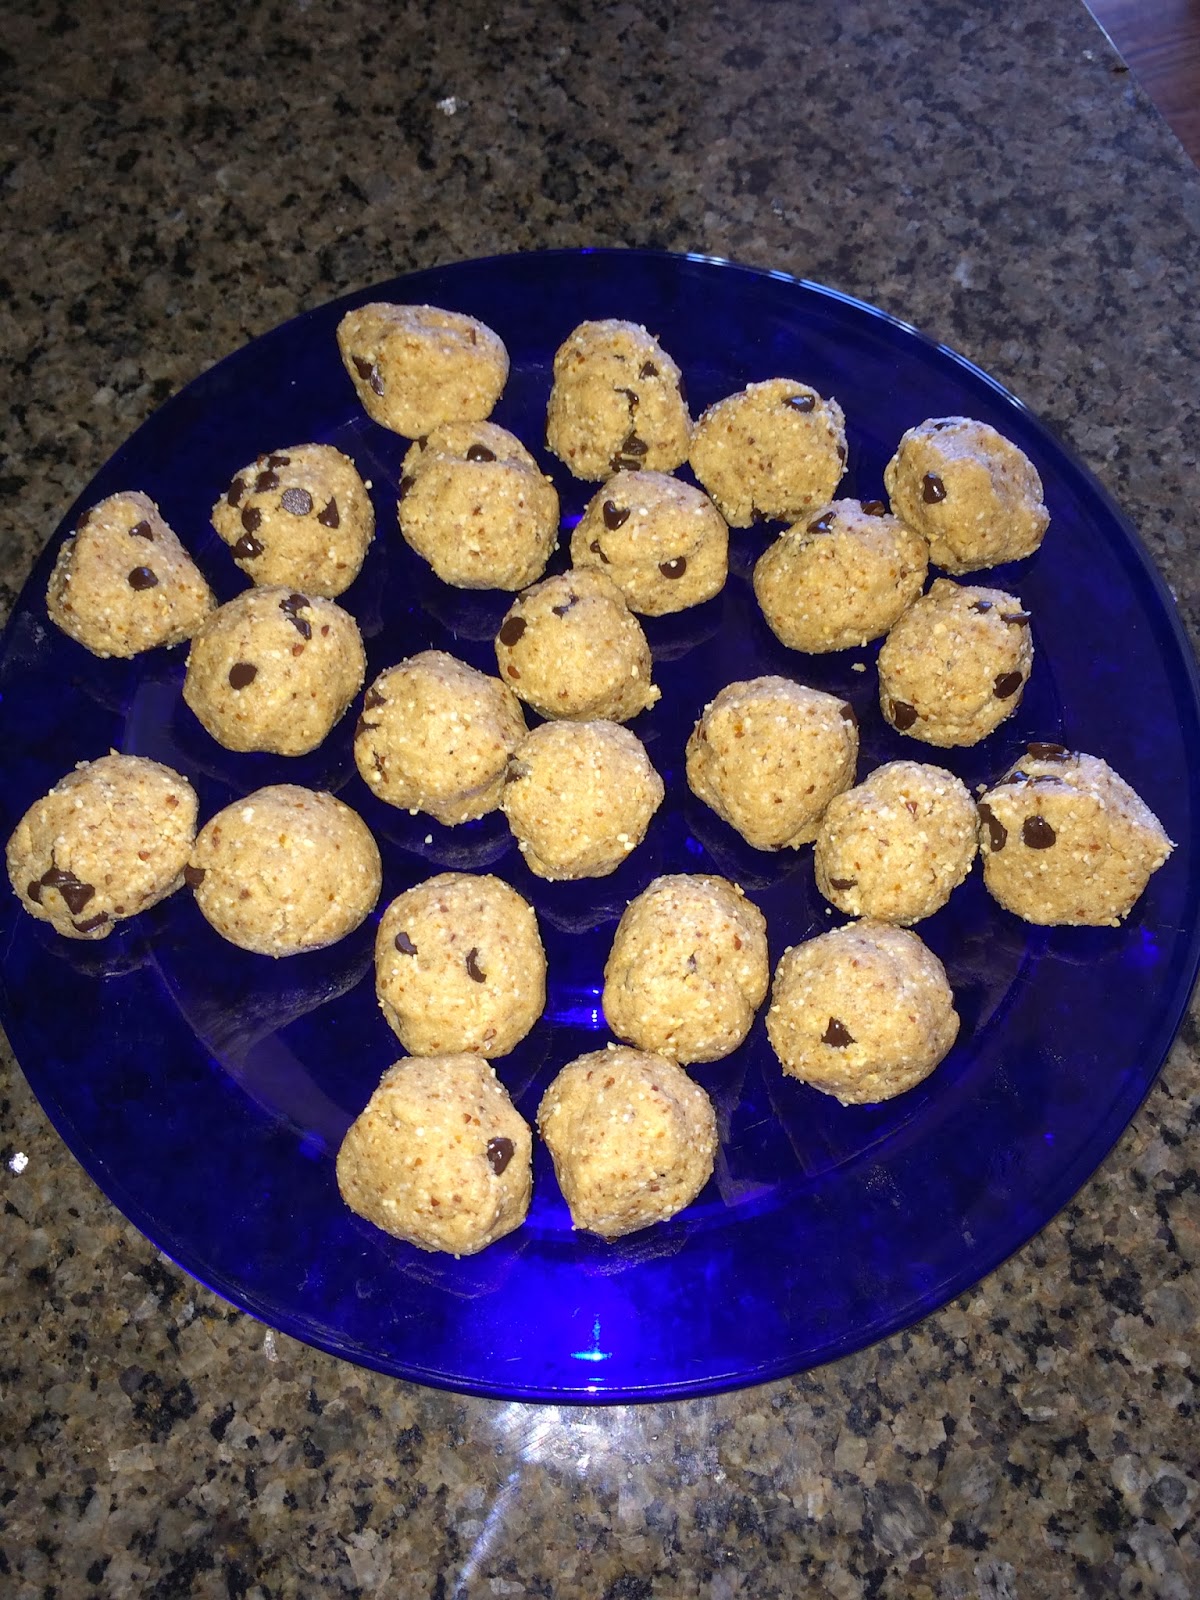
Cookie Dough Balls (Protein-Power Packed)

It has been another busy week in my kitchen, and I have two more amazing recipes to share with you.  These are hands-down my kiddos absolute FAVORITE things to eat for an after-school snack or before a practice, training session, or soccer game.  They have truly enjoyed the "taste-testing & experimenting" process for this recipe, and now request that we have a constant supply on hand.   My husband has even given them his stamp of approval and packs them to eat before or after a workout, or as a quick snack in-between his constant meetings at work.  I have tested them on practically every adult and kid that has entered our home over the past 2 weeks, and even the finickiest eaters have given me a smile and a thumbs up. 

It is always bittersweet to post a recipe.  It's like a baby bird leaving the nest.  I honestly put so much work into them, tweaking them until I find that perfect balance of nutrition and yumminess.  Although I have opted for an alternative way of eating, being grain free, I refuse to give up on taste and texture.  This southern girl will never solely think of food as a source of energy.


Chocolate Chip Cookie Dough Power Balls
(these are grain-free, gluten-free, and depending on your protein powder & chocolate chip, can be dairy-free)
Ingredients:

9 medjool dates, pitted
1 & 1/4 cup cashews, unsalted
1/2 cup almond flour
1/4 cup coconut flour
3 scoops vanilla protein powder
2 Tablespoons ground flax seed
1/2 teaspoon salt
1 Tablespoon pure maple syrup
1/2 teaspoon vanilla extract
1/4 cup mini chocolate chips

Directions:

Combine, dates, cashews, flours, protein powder, flax seed, and salt in a food processor.  Blend until combined and evenly ground.  While food processor is running, add in syrup and vanilla.  Blend until a stiff dough forms. 

Transfer dough to a medium mixing bowl and stir in chocolate chips. 

Roll dough into 1 inch balls, and store in an air-tight container in the refrigerator. 

Makes about 24 balls.

Nutritional Information:

Serving Size: 1 ball

Calories: 90
Fat: 4.5g
Carbs: 8.5g
Sugars: 5g
Protein: 5g
Fiber: 1.5g

Seriously, compare that to your average chocolate chip granola bar that has: 100 calories, 2.5 grams of fat, 18 carbs, only 1 gram of both protein & fiber and 6 grams of sugar.  Which one do you think is going to fuel your body better???


Peanut Butter Power Balls
(these are grain-free, gluten-free, and depending on your protein powder & chocolate chip, can be dairy-free)

These little guys are a throwback to my all-time favorite candy.  In my mind, chocolate and peanut butter were meant to be together forever just like me and yoga pants.  I seriously came up with this recipe one afternoon after we purged our pantry of all candy.  Yes, there were tears in our house for sure.  Now I can enjoy that same beloved combination and not feel guilty about it or have that nasty sugar high & low.  I have yet to not have a kid ask for seconds of this tasty and power-packed snack.

Indredients:

9 medjool dates, pitted
1 cup dry roasted peanuts
1/2 cup almond flour
1/4 cup coconut flour
1/2 teaspoon salt
2 Tablespoons ground flax
3 scoops vanilla protein powder
2 Tablespoons pure maple syrup
1 teaspoon vanilla extract
1/4 cup milk chocolate chips (optional, but included in nutritional info)

Directions:

Combine, dates, peanuts, flours, protein powder, flax seed, and salt in a food processor.  Blend until combined and evenly ground.  While food processor is running, add in syrup and vanilla.  Blend until a stiff dough forms. 

Transfer dough to a medium mixing bowl and stir in chocolate chips. 

Roll dough into 1 inch balls, and store in an air-tight container in the refrigerator. 

Makes about 24 balls.

Nutritional Information:

Serving Size: 1 ball

Calories: 90
Fat: 4g
Carbs: 8.5g
Sugars: 5.5g
Protein: 5g
Fiber: 1.5g

Enjoy!

Monday, February 24, 2014

Recipe Remix

I don't know about you, but I tend to get stuck in a dinner rut.  About once a month I try to infuse some new recipes into our dinner rotation, but sadly I always find myself falling back to my good ol' standbys, especially when my husband is traveling for work.  After helping three kiddos with homework and shuttling them around to various activities every evening, the last thing I want to do is "negotiate" dinner.  Seriously, you know you have those nights when you feel like you're playing a poker game rather than eating a meal.  Your child asks, "How many more bites to I HAAAVE to take?", you in turn throw out a number, and the negotiations start until someone folds. Therefore I have 2 standbys that I know I can always go to that will ensure happy plates and faces all around.... tacos & pizza. 

Trying to incorporate wheat-free and healthier alternatives made me put on my thinking cap to give these two family favorites a much needed make-over.  I had a light bulb moment while strolling through the produce section of my favorite grocery store.  Portobello mushrooms would be my new pizza crust!  Why had I never thought of this before?!?!  It is absolutely my new favorite go to lunch and the kids love it too.  "Make your own pizza" nights have always been a huge hit in our house and cleaning a few mushrooms and snapping off the stems is much easier, healthier, and less elbow grease, than kneading pizza dough.  And bonus, dinner is ready in minutes with little to no prep work!


Portobello Pizzas


Preheat oven to 500 degrees.  Clean & remove the stem of the mushroom.  Place on a baking sheet, top with pizza or marinara sauce, mozzarella cheese, and favorite pizza toppings.  Bake for 5-8 minutes or until cheese is bubbly.


The taco make-over was a little more tricky.  I have been substituting turkey for our tacos for over a year and the kids have honestly never caught on.  However, getting rid of the tortilla or mound of chips my kids eat the meat on was a little more tricky.  I have found that with children, at least in my household, presentation is EVERYTHING, starting with what I call dinner.  For example if I say we are having turkey taco meat on avocado, I would immediately get resistance and groaning, but simply by eliminating the turkey reference, and calling the avocado a "boat", voila, they are instantly excited to try something new and think outside the "taco shell".  I came up with this little gem of an idea last week, and honestly I can't wait to have it again.
 
(ps.  To address the 2 questions that must be at the front of your mind... Yes, I do have other dishes, and no, I do not have a professional food stylist.  I know, you're shocked.  Lol!  These are my actual dinners that I have taken a picture of with my phone no less.  If they are blurry, it is because I was in a hurry so that I could dive in to my meal.  Remember, this is the beginning, and I'm keeping the "expectations" bar low.  Ha!) 

 
Taco "Boats"


Ingredients:
 
1 pound ground white turkey
1 tablespoon chili powder
1/4 teaspoon garlic powder
1/4 teaspoon onion powder, or dried minced onion
1/4 teaspoon oregano
1/2 teaspoon paprika
1 & 1/2 teaspoon ground cumin
1 teaspoon salt
1 teaspoon black pepper (or for a spicy kick, add a pinch of red pepper flakes)
1 tablespoon coconut flour
3/4 cup hot water
4-6 ripe avocados
 
Garnish: shredded lettuce, diced tomatoes, shredded cheddar cheese, salsa, plain greek yogurt (tastes just like sour cream, but so much better for you!)
 
In a large skillet brown turkey meat until cooked through, stirring as needed.  While meat is cooking, combine chili powder, garlic powder, onion powder, oregano, paprika, cumin, salt, pepper, & flour in a small dish. When meat is browned and cooked through, drain off any grease and return pan to burner.  Add seasoning mixture to meat, and stir to evenly distribute.  Pour in hot water and continue cooking on medium heat (stirring occasionally) until sauce is thickened. (About 5 minutes) 
 
Slice avacados in half, remove seed, and fill with turkey taco meat.  Garnish as desired.


Thursday, February 20, 2014

Better Batter Brownies

It has been an exhausting day, but I wanted to post this because well, this is the first (of hopefully many) recipe I have ever written and I can not wait to share it with you!  It is by far one of my new favorite things to eat, and the fact that it's healthy definitely makes me feel less guilty when I eat it every day.

My family recently went "wheat free".  Well, technically I did, and my family has followed suit, with a few compromises.  Nonetheless, that really narrows the field when you take grains off the plate, especially when it comes to sweets.  To help aid in the transition I decided to start with sweets, and have slowly started incorporating wheat-free items into the breakfast rotation.  Those are the two areas we have the most wheat impact in our house.  I have several muffin, breads, & pancake recipes still "in progress", but there is one recipe that I have figured out, and it is the "healthy brownie".  I have to say, my passion for the kitchen was reignited when we, I mean I, decided to make this dietary change.  I had many reasons for doing so, that I will discuss another day, but the catalyst was the encouragement of my personal trainer to read "Wheat Belly" after a lengthy discussion one day.  I have to admit, second only to the Bible, I don't think another book has changed my life so drastically.

I'm sure the most ideal scenario would be just to eliminate all sweets from your diet, but I'll be honest with you...that's never going to happen.  I grew up having dessert after every meal.  My mom swears it's part of our German heritage.  I searched the internet, even tested the waters of Pinterest, and checked out several books from the library for recipes that looked delicious enough to try.  Sadly they only resulted in many attempts and complete disappointment of making creations that claimed to be "the world's best healthy brownie", "most delicious melt-in-your-mouth cake", and coming up with things that tasted nothing short of a baked banana rolled in cocoa powder, with expensive ingredients no less.  A single pound of almond flour runs about $10.  Compare that to a 5 pound bag of enriched white flour that runs less than $2, so you're looking at about 40 cents a pound, and I'd say that's a pretty significant difference.  And that's just one ingredient!

So, without further ado, here is my recipe debut!  I wish I had some kind of catchy name for them, but I don't.  This recipe has been my baby for over a month.  I've been tweaking it and  after I stopped making things that tasted like sour bananas, my family gladly offered to be my taste-testers.  I knew when my husband said he would eat this version every day and then helped himself to one after lunch AND dinner this weekend, it was a done deal.  I hope you enjoy them as much as we do.  I am sure you can modify them to make them even healthier, I just have not had the time to test out all the variations.  We are happy with this combination in our home, and after all, they are brownies, and a dessert.  So, in my book that makes a little sugar ok.  Hey, I'm new at this & I never claimed to be a health expert. :)

"Better Batter Brownies"
(these are wheat-free, gluten-free, and dairy-free)

Ingredients:


1/2 cup almond flour
1/2 cup, plus 3 Tablespoons cocoa powder
1/4 cup sugar
1 Tablespoon coconut oil (I prefer unrefined here)
1/2 teaspoon baking soda
1/4 teaspoon salt
1/2 cup Medjool dates, pitted (about 6-7)
1/4 cup chocolate almond milk, or coconut milk (updated 4/2014)
2 Tablespoons ground flaxseed
1 teaspoon vanilla
2 large egg whites

Directions:

Preheat oven to 325 degrees.

Line an 8x8 inch pan with parchment paper.

Combine almond flour, 1/2 cup cocoa, sugar, baking soda, salt, pitted dates, and flaxseed in a food processor.  Pulse until combined and dates are processed.  Pour this into a medium mixing bowl, and set aside about 1/2 cup of this mixture in a separate mixing bowl.


If you've never pitted a date, this is what that looks like.  I had never touched a date before I started eating cleaner, and now I have a constant supply  in my fridge.  Sometimes I start to panic if my "stash" gets down to my last container. LOL!  Costco is a great source for these if you're lucky enough to have one near you.

 
To remove the "pit" from a date just gently slice it down the middle and remove that seed-looking thing.
 
 
In a separate medium-sized mixing bowl, beat the egg whites until medium to stiff peaks form.  About 1 minute with a hand-mixer on high.  You should be able to lift the beaters from the foam and see "peaks" on the end.
 
 
Okay, we are going to get just a few more dishes dirty before putting this whole thing together.
 
Take the reserved 1/2 cup of the date mixture and gently fold it into the egg whites.
 
 
If you've never "folded" eggs before, just stir softly until it looks about like this. :)


Spoon 1 Tablespoon coconut oil into a separate small microwavable dish.  Heat until melted.  It usually takes about 1 minute for me.  I prefer unrefined coconut oil because it still has a hint of coconut flavor, but refined is good here too, or you can also use olive oil, but you would just skip the melting step.  Once it's melted stir in the remaining 3 Tablespoons of cocoa powder.  Add this mixture to the remaining date mixture (not the egg whites).  Stir in the almond milk and vanilla until a smooth paste forms. 
 
 
You could stop right here and eat this straight out of the bowl!  It would make a great dip with a little more milk or you could roll it into truffles.  Remember, this bowl is egg free so far.  You better believe that's my finger and I ate that.  Hey, "quality control" right?!?! LOL!
 
Now it's time to put everything together.  Gently stir (or fold) the egg white mixture into the date mixture until it's combined.  Pour into your 8 inch square pan that is lined with parchment paper and smooth it out until it's somewhat even.


Bake for 20-22 minutes at 325, or until a toothpick comes out clean.  This is a dense, chewy brownie, so it may not be completely clean when you pull out the toothpick, but as long as it's not ooey-gooey and well, brownie like.
 
And the beauty of the parchment paper is you can lift it straight out of the pan, no mess, and enjoy!  Store these in an air-tight container.  My favorite way to eat them is with a heaping pile of berries on top (my family prefers sweetened whipped cream too).  Absolutely delicious!!


Nutritional Information: (approximately), 12 brownies
 
Serving: 1 brownie
 
Calories: 103
Fat: 4.5g
Fiber: 2.3g
Protein: 3.25g
Carbs:14g
Sugars: 9.5g